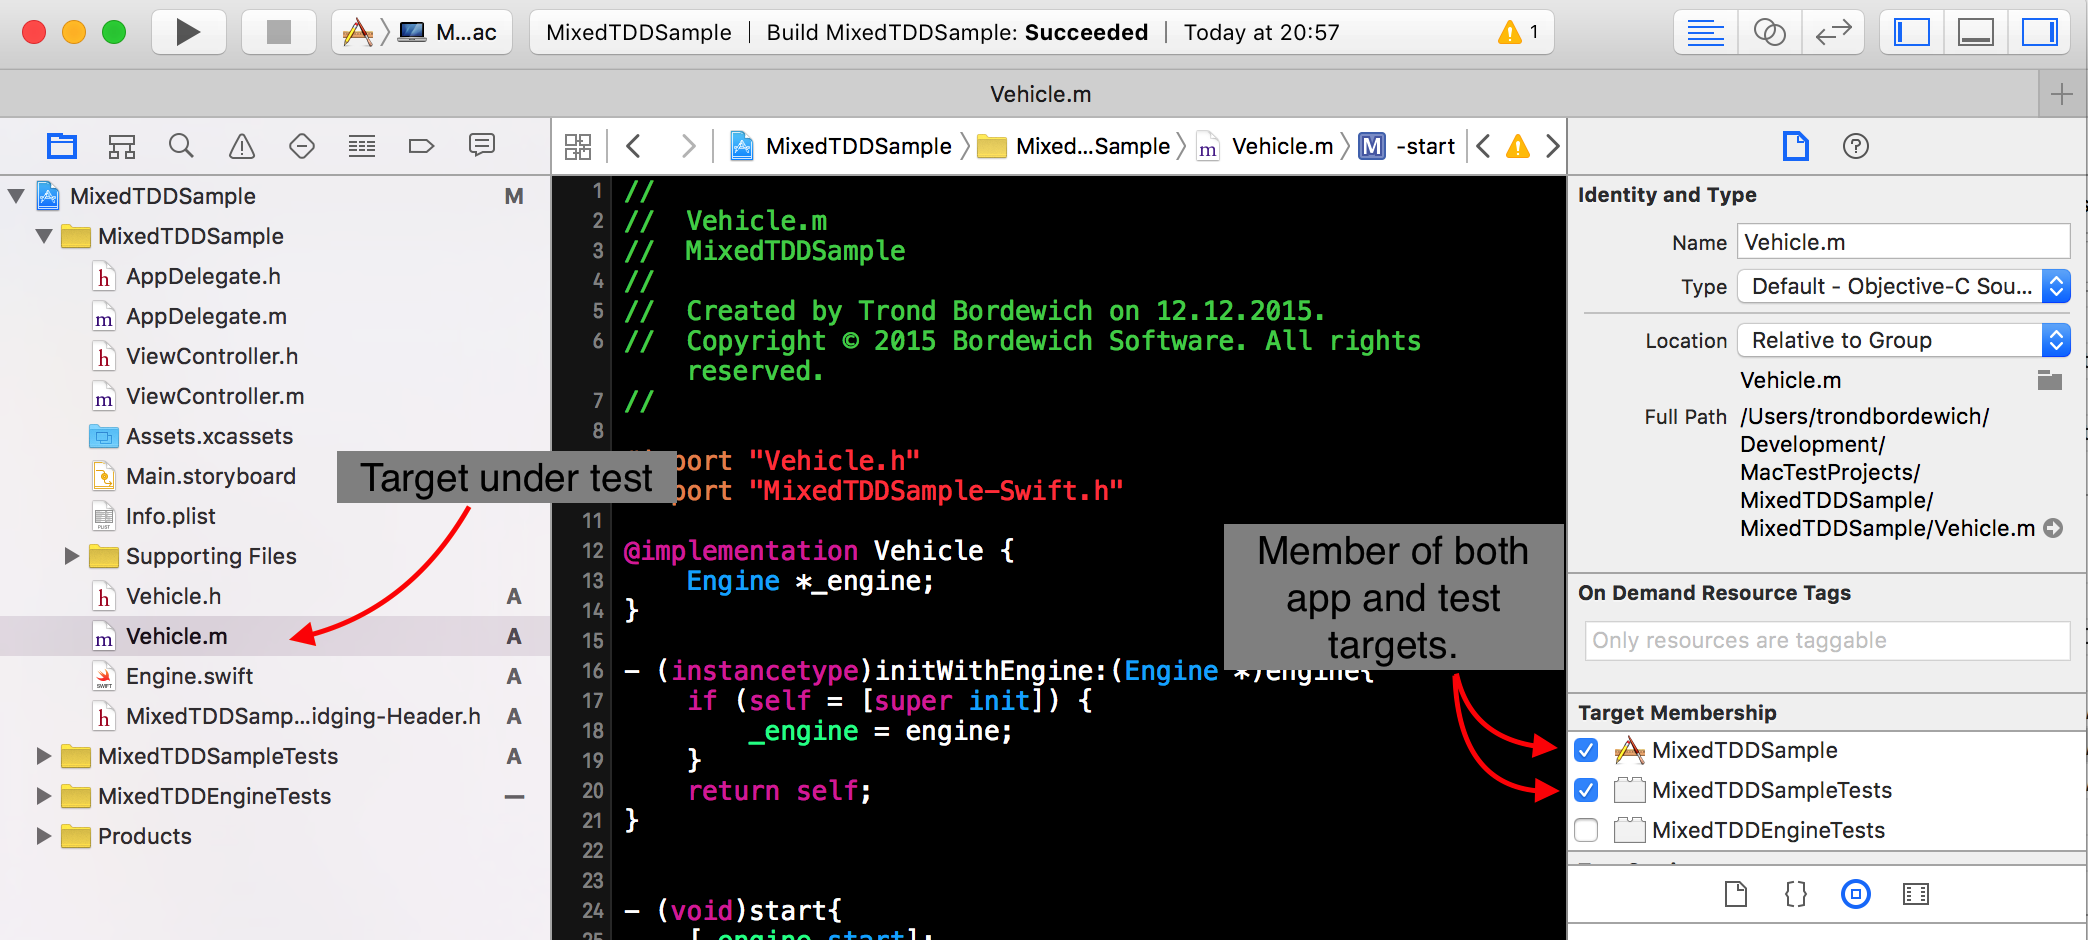
In pure Swift or Objc projects it is pretty much straight forward to do unit testing. You just have to make sure you add the class under test to your test target so that the code is accessible from the test class. This applies to both Swift and Objc. See image below.
Working in mixed Objc and Swift environments presents it’s own set of challenges. Say you are working on a project that originally was written in Objective-C and now you are eager to get started with Swift. So all your new classes are written in Swift.
Now you are in a situation where it is inevitable that your Swift classes will touch Objective-C classes. So
you have to deal with the Bridging-header, and the generated Swift-header to make it work both ways.
This is usually not a problem, since all your classes are in the same project, and member of the same target.
When you need to access your swift classes from Objective-C, you include the [Target-Name]-Swift.h and you
can use your Swift class as though it was Objective-C. Then to access the Objective-C classes in Swift
you add the import-statement to you bridging-header, and you can use the Objective-C class as though it
was Swift. This is great because you can now slowly convert bit by bit to Swift, or at least turn to swift
for all the new stuff you add.
Then you have the unit tests. Because you do write unit tests, right? When dealing with these mixed Objective-C and Swift environments you will encounter a few challenges when it comes to importing and accessing classes from your unit tests. Because if you don’t take care, you will end up in a situation where your target is not accessible from your tests. To follow along you can also find the sample project here.
Here is an Engine class written in Swift:
class Engine: NSObject {
    var isRunning = false

    func start() {
        isRunning = true
    }
}
Then we use the engine in a Vehicle written in Objective-C:
// Interface
#import "Engine.h"
@class Engine; //Predeclaration of the Swift class
@interface Vehicle : NSObject
- (instancetype)initWithEngine:(Engine *)engine;
- (void)start;
@end
// Implementation
#import "Vehicle.h"
#import "MixedTDDSample-Swift.h" // <- The Swift-generated header.
@implementation Vehicle {
Engine *_engine;
}
- (instancetype)initWithEngine:(Engine *)engine{
if (self = [super init]) {
_engine = engine;
}
return self;
}
- (void)start{
[_engine start];
}
@endThe setup over works fine to enable you to use your Swift classes in Objective-C and the other way around
(as long as you remember to include the Objective-C headers in the Bridging-Header).
Running the tests.
We have this test:
func testVehicleCanStartEngine() {
    let engine = Engine()
    let vehicle = Vehicle(engine: engine)
    vehicle.start()
    XCTAssert(engine.isRunning, "Engine should be running now")
}
This test uses both the Swift class Engine and the Objective-C class Vehicle.
First we add the Vehicle.m-file and the Engine.swift-file as members of the test target.
Then we have to import the Vehicle.h in the MixedTDDSampleTests-Bridging-Header.h like so:
// MixedTDDSampleTests-Bridging-Header.h
#import "Vehicle.h"
Running the test will produce the following error:
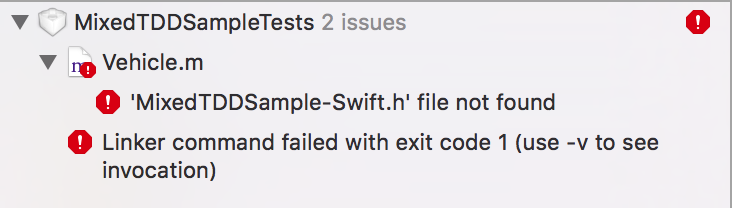
This is actually an expected failure since this header is generated by the MixedTDDSample-target,
and the test target does not have this header. The test target will have it’s own generated swift
header called MixedTDDSampleTests-Swift.h based on the Product Module Name in the target
configuration. So how do we go about solving this?
Actually there are two ways to solve this.
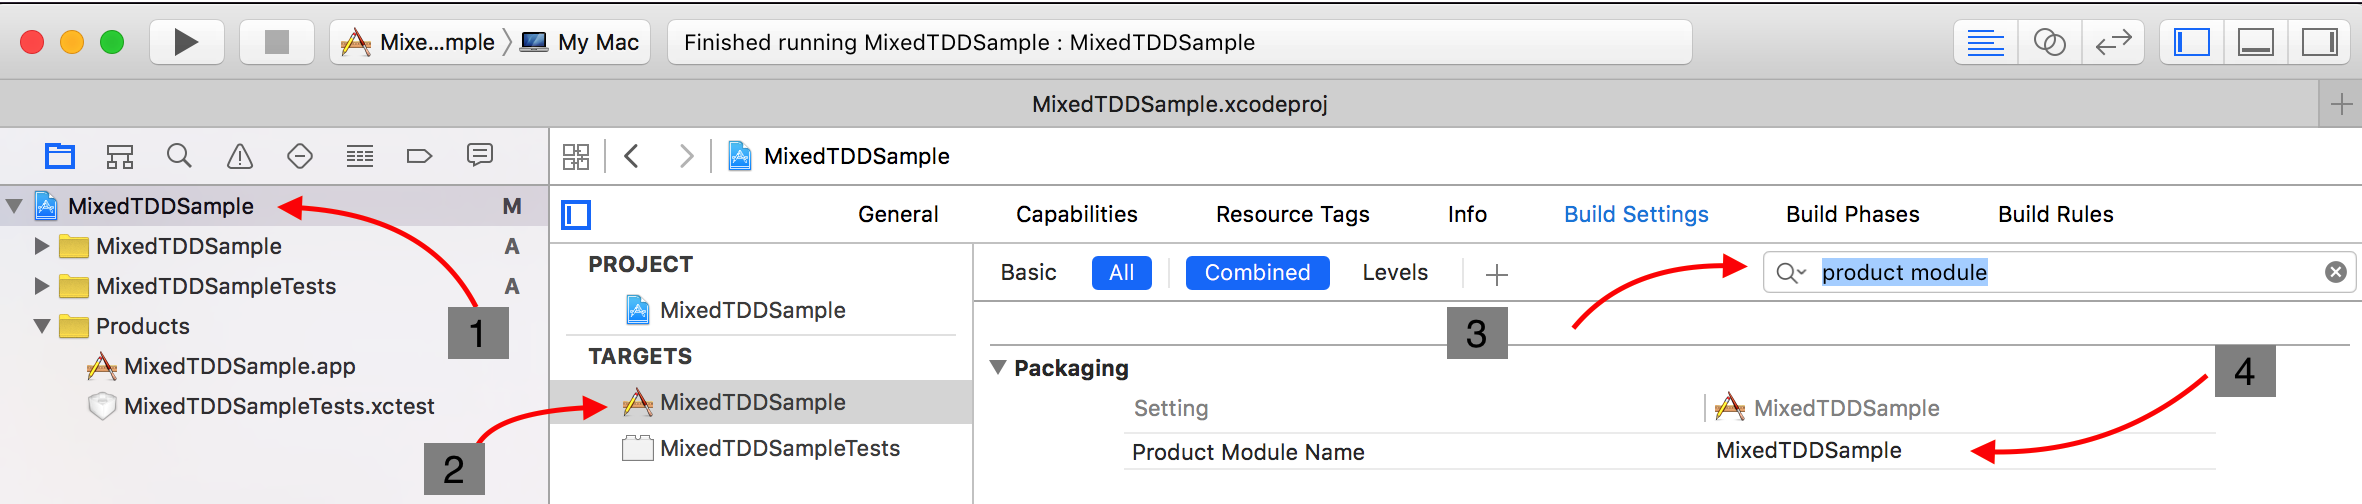
1. Use the same ‘Product Module Name’ for the app and the test.
The configuration of your app target will usually use the product-identifier as a module name, like in
the case of the MixedTDDSample. Here is how to find it:
- Select the project.
- Select the target.
- Search for
product module. - You should then see the configuration for
Product module name.
Now select the test target and you will see that our example will have this configuration:

If you change the Product Module Name to match the product name, MixedTDDSample:
 the generated header will have the correct name. And you will be able to run your tests with success.
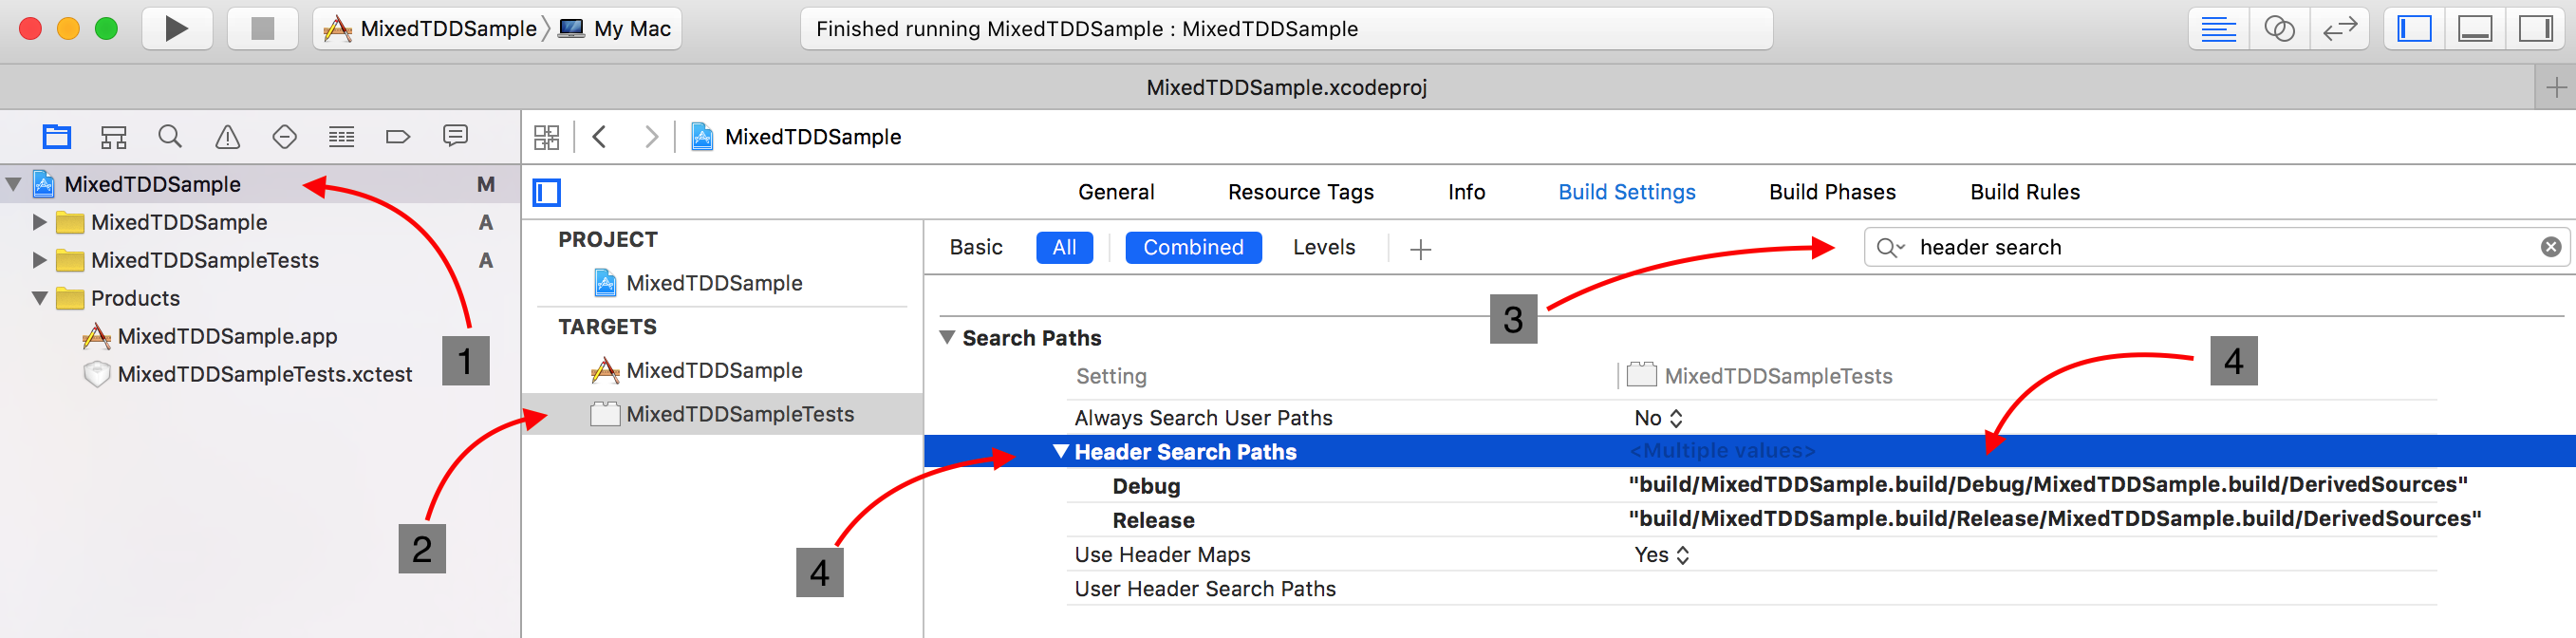
2. Include the path to the generated header in the ‘Header Search Path’ of your test target.
Doing this will make your test target search for the generated swift header at this path. The main difference here is that in this case you get two generated Swift headers. Here is how to do it:
- Select the project.
- Select the test target.
- Search for `header search path’.
- Select the configuration for
Header Search Paths - Add the following:
"$(CONFIGURATION_TEMP_DIR)/MixedTDDSample.build/DerivedSources"
The positive in using the Header Search Paths-method over the Product Module Name-method is that if
you have more than one test target, which you may have if you have some logic tests as well, you won’t
get all the classes from the main target included in both test targets, you will only get the ones
you add.
Please leave a comment if you have an opinion, or any other experience with testing in these situations.
Happy mixed testing!
comments powered by Disqus